A job is a single piece of work at an address: a window clean, a lawn cut, a regular tidy. In Roundo every job belongs to a customer and repeats on its own schedule, so once it’s set up it keeps coming round on your worksheet without you having to remember it.
This guide walks through creating a job from start to finish. It takes about a minute.
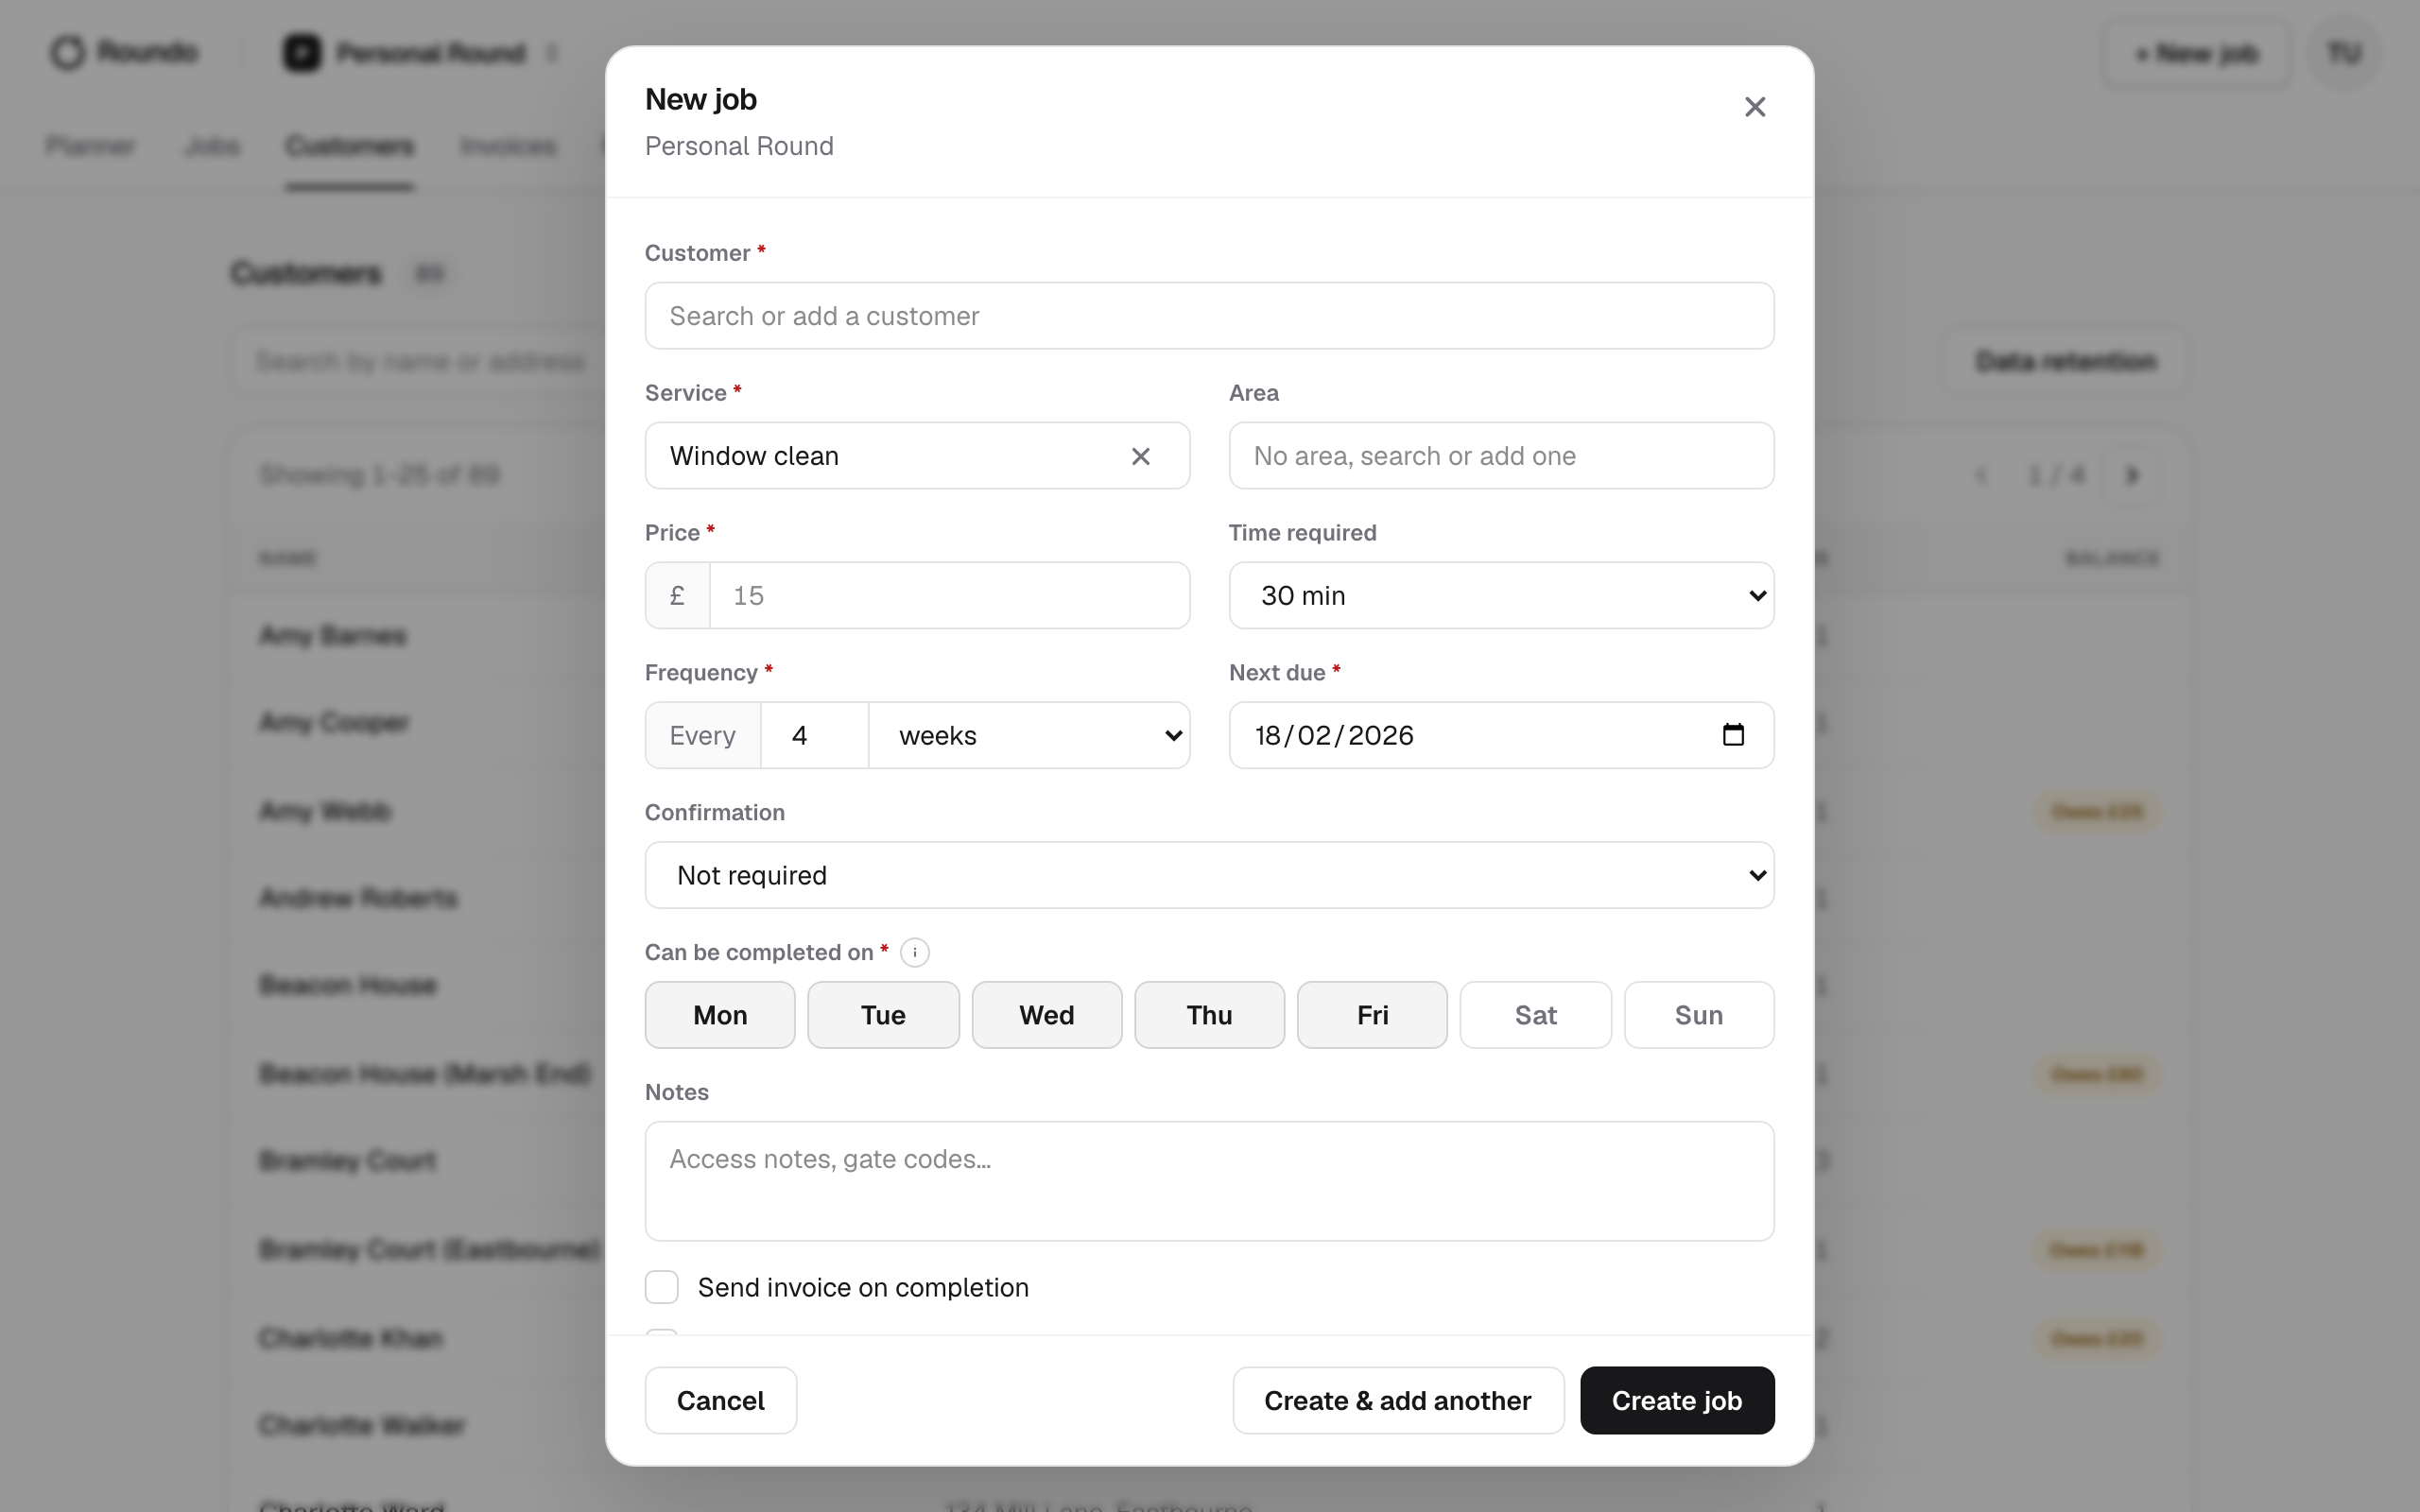
Start a new job
Choose New job. You’ll find it in the top bar wherever you are, on the Customers page, and on any customer’s own page. Starting from a customer pre-fills that customer for you, which is the quickest way when you already know who the work is for.
If the customer is brand new, you can create them right here as you make the job. See Add a customer for that path in full.
Choose the customer and service
Pick the customer the work is for, then choose the service, for example a window clean or a garden visit. Both are required: a job always belongs to a customer and is always a particular kind of work. You pick the service from your existing list; if the one you need isn’t there yet, add it to your services in Settings first, then come back and choose it here.
Set the price
Enter the price for one visit. This is what the customer owes each time the work is done, and Roundo uses it to keep their balance up to date as visits complete. You can change a job’s price later at any time, and the next visit picks up the new figure.
Choose how often it repeats
Every job in Roundo recurs, so you tell it how often to come round again: every week, every four weeks, every month, and so on. You set this as “Every” a number of days, weeks, months or years. A new job starts from your round’s usual frequency, and if you haven’t set one it defaults to every four weeks.
There’s no separate “one-off” switch. If a piece of work really is a one-time thing, just complete the single visit and leave it, or remove the job afterwards.
Set the first date
Give the job its first working date, the “Next due” date, which defaults to today. From there Roundo rolls the schedule forward for you: complete a visit and the next one is booked automatically at the interval you chose, so a recurring job never quietly falls off the list.
Add the optional details
A few optional fields help Roundo plan the work well, and you can skip any of them:
- Area groups the job with others on the same road so Auto Plan does them in one trip.
- Time required tells the planner how long a visit takes, so it can fill a day sensibly.
- Can be completed on sets which days a visit is allowed to happen. All days are on by default; turn off any the customer won’t accept.
- Notes is the place for access notes, gate codes and anything worth remembering on the doorstep.
You can also switch on Send invoice on completion, so an invoice goes out automatically each time the work is done, and choose whether to add the job to your worksheet on its next due date straight away.
Save it
Choose Create job to finish, or Create and add another to save this one and line up the next without leaving the form, handy when you’re setting up several jobs for the same customer.
What happens next
Once saved, the job appears on your worksheet for its due date, grouped with the rest of that day’s round. Work through the day, mark each job done or skipped with a reason, and the money owed updates as you go. Every completed visit is logged against the customer, so their history and running balance stay accurate with no extra bookkeeping.
From here, let Roundo do the scheduling for you with Auto Plan, or bill completed work with Create and send an invoice.